01:11 am
Introduction
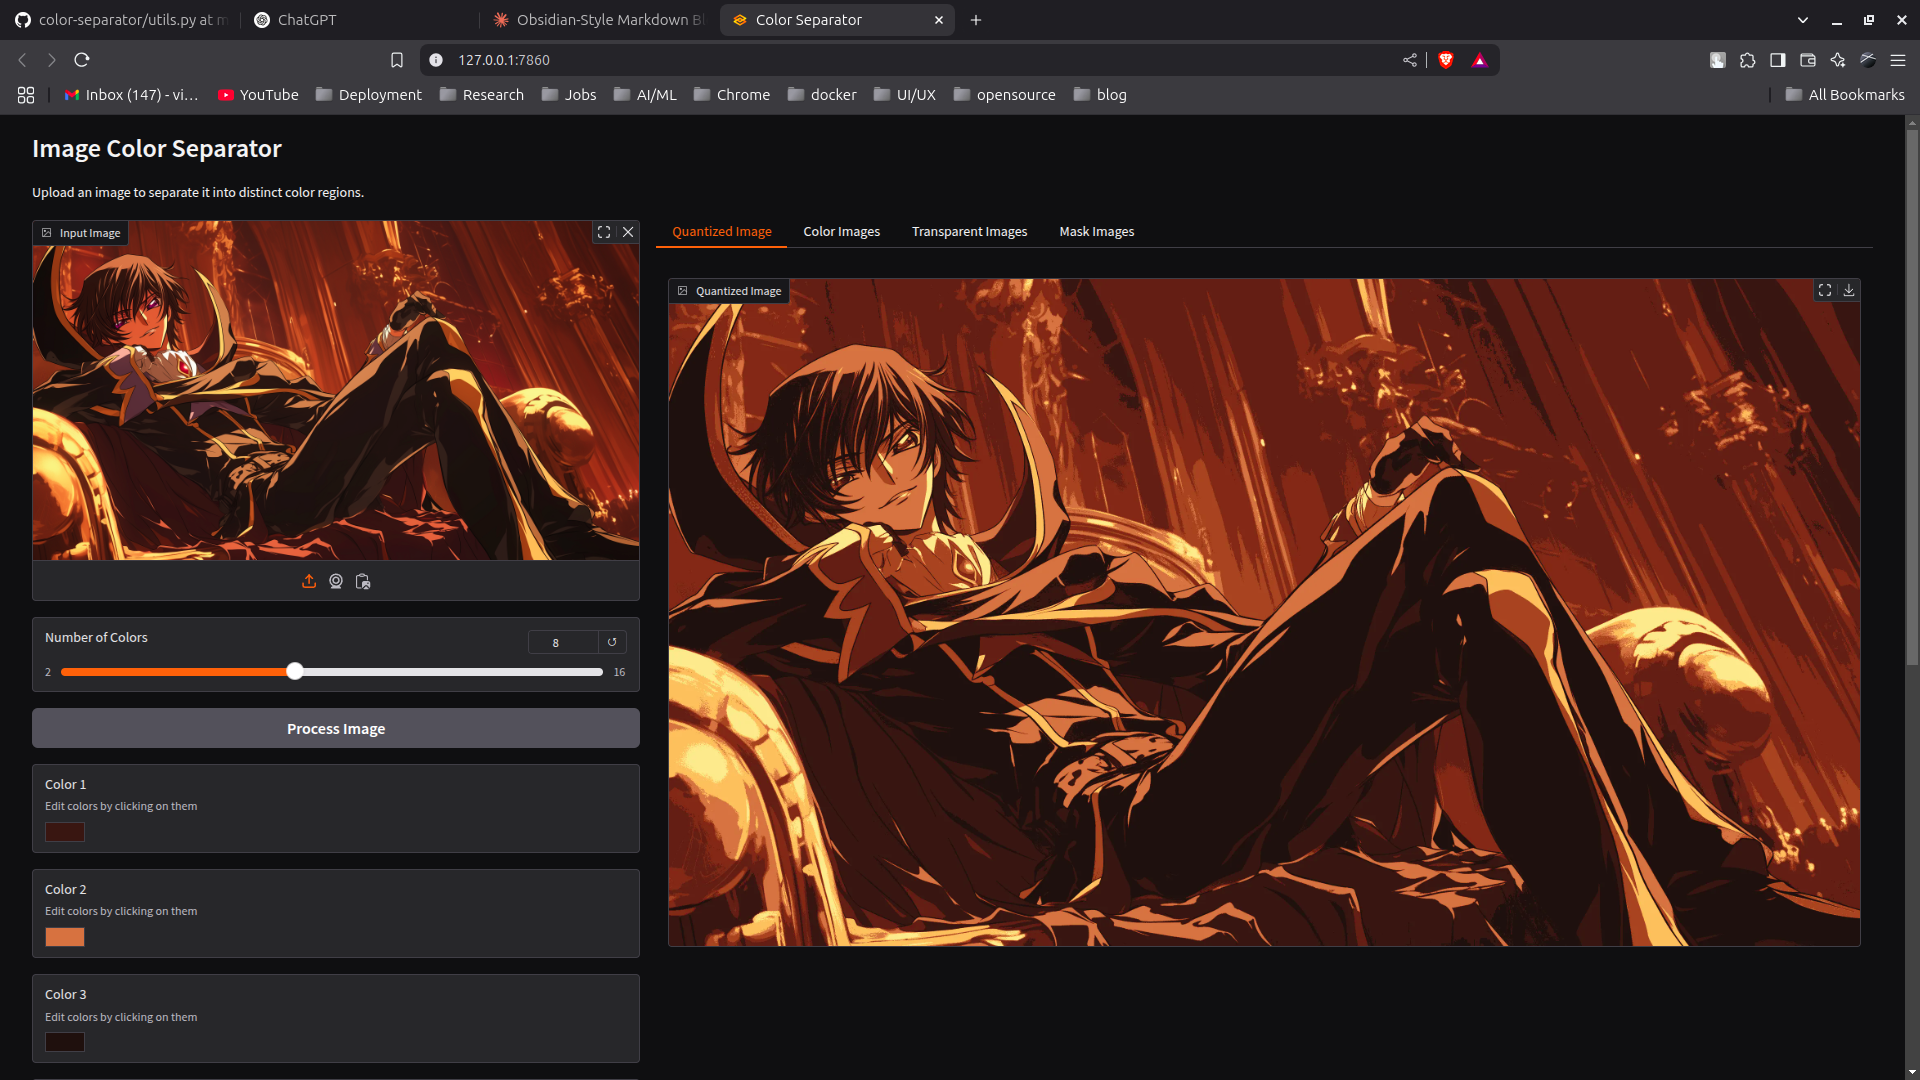
Color Separator is a powerful tool designed to separate and manipulate colors in images. By using image quantization, it reduces an image to a specified number of colors and then separates each color into individual layers that can be edited. This tool is particularly useful for graphic designers, artists, and anyone interested in color manipulation. You can find the project on GitHub.
Features
Quantize Images
Reduce an image to a specified number of colors.
Separate Colors
Split colors into individual layers.

Edit Colors
Modify colors directly through an intuitive interface.
Generate Output Formats
- Color layers with white background
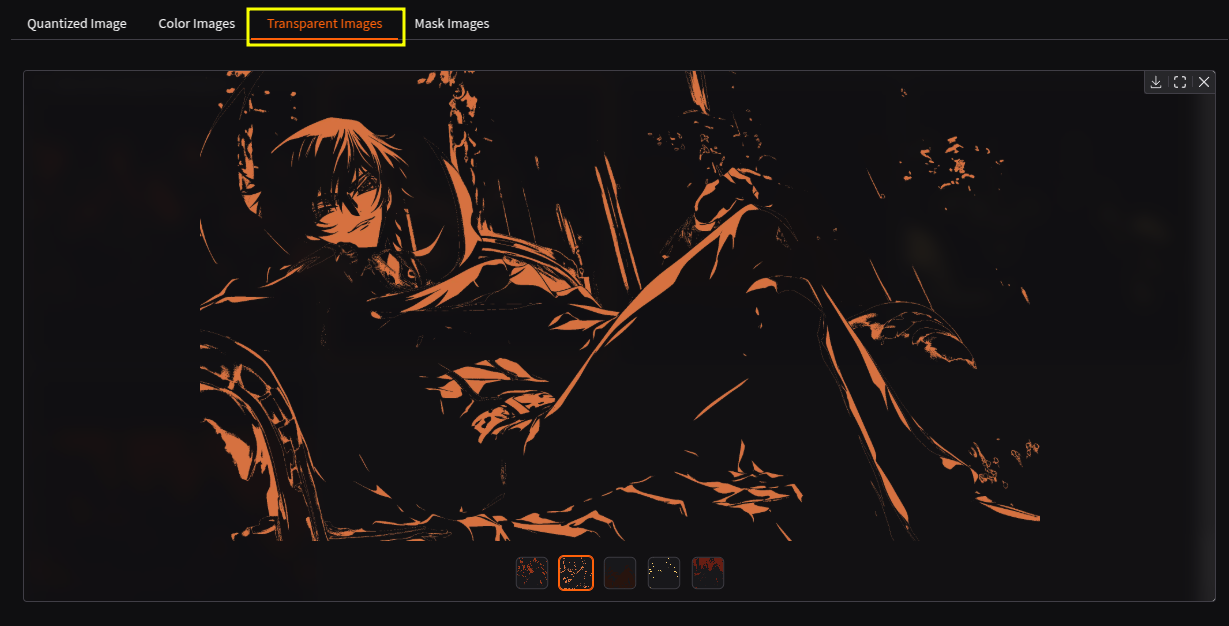
- Color layers with transparent background
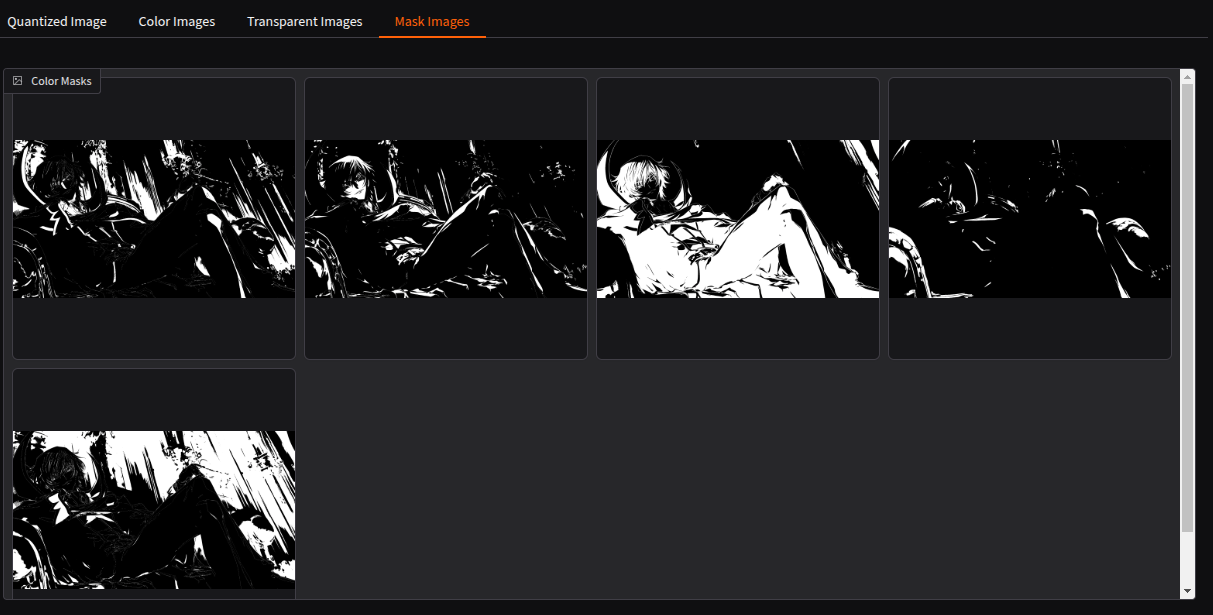
- Binary masks for each color
Real-time Preview
See changes in real-time as you edit colors.
-
Edit Colors: Modify colors directly through an intuitive interface.
-
Generate Output Formats:
- Color layers with white background
- Color layers with transparent background
- Binary masks for each color
-
Real-time Preview: See changes in real-time as you edit colors.
Importance
Color Separator leverages the power of K-means clustering from OpenCV to provide precise and efficient color quantization. This makes it an invaluable tool for tasks that require detailed color analysis and manipulation.
Applications
Color Separator is not only useful for graphic designers and artists but also finds applications in various industries. For instance, in the fabric industry, it can be used in printing machines to separate and manipulate colors for textile designs. This ensures precise color reproduction and consistency across different batches of fabric. Additionally, it can be utilized in quality control processes to detect color variations and maintain high standards in production.
Installation
Prerequisites
Using pip and venv (Recommended)
-
Clone the Repository:
git clone https://github.com/h3110Fr13nd/color-separator.git cd color-separator -
Create and Activate a Virtual Environment:
python -m venv .venv source .venv/bin/activate # On Windows: .venv\Scripts\activate -
Install the Package:
pip install -e .
Using pip Directly
pip install git+https://github.com/h3110Fr13nd/color-separator.gitManual Installation
-
Clone the Repository:
git clone https://github.com/h3110Fr13nd/color-separator.git cd color-separator -
Install Dependencies:
pip install -r requirements.txt # or use: pip install gradio numpy opencv-python
Usage
Running the Web Interface
-
Launch the Application:
python app.pyAlternatively, you can run the following command to start the application with a specific port:
gradio app.pyThis will start the application on port 7860.
You may also specify the host and port using the
--hostand--portflags respectively using gradio. -
Open Your Web Browser and navigate to:
http://localhost:7860
Using the Interface
- Upload an Image: Click on the upload area to select an image from your computer.
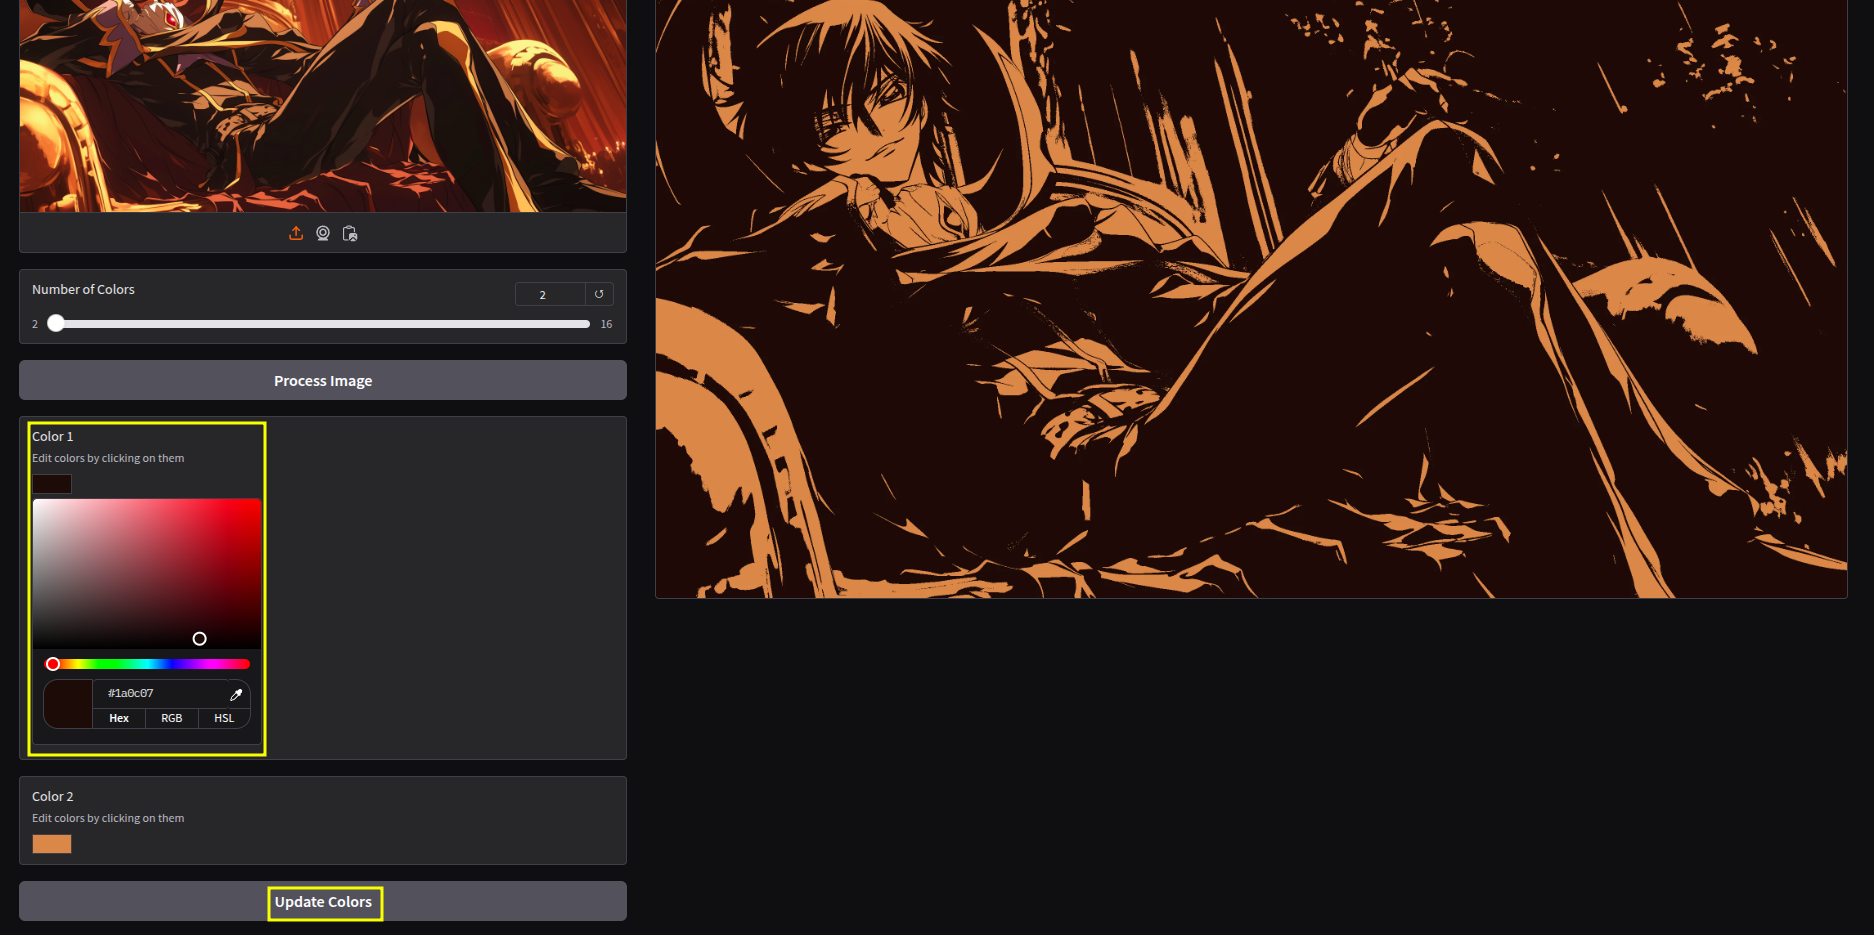
- Adjust the Number of Colors: Use the slider to set how many colors the image should be quantized to (range: 2-16).
- Process the Image: Click the “Process Image” button to analyze and separate the image.
- View Results: Navigate through the tabs to see:
- Quantized image
- Color layers with white background
- Color layers with transparent background
- Binary masks for each color
- Edit Colors: Modify any color by clicking on its color picker. The changes will be reflected in all output formats.
- Update After Editing: Click the “Update Colors” button to apply your color changes.
Command Line Usage
The tool can also be used from the command line for batch processing:
python -m utils input_image.jpg [number_of_colors]Example:
python -m utils my_image.jpg 8This will create an output directory with the processed images.
Code Snippet
Here is a snippet of the main function that processes the image and separates colors:
def quantize_image(image_path, n_colors):
      if not os.path.exists(image_path):
            print(f"Error: File {image_path} does not exist")
            return None, None

      img = cv2.imread(image_path)
      if img is None:
            print(f"Error: Unable to read image from {image_path}")
            return None, None

      img = cv2.cvtColor(img, cv2.COLOR_BGR2RGB)
      h, w, _ = img.shape

      img_flat = img.reshape(-1, 3)  # Flatten the image to a 2D array

      # Convert to float32
      pixels = np.float32(img_flat)

      # Define criteria
      criteria = (cv2.TERM_CRITERIA_EPS + cv2.TERM_CRITERIA_MAX_ITER, 100, 0.2)

      # Apply KMeans
      _, labels, centers = cv2.kmeans(pixels, n_colors, None, criteria, 10, cv2.KMEANS_RANDOM_CENTERS)

      # Convert back to uint8
      centers = np.uint8(centers)

      # Map each pixel to its corresponding centroid
      quantized = centers[labels.flatten()]

      # Reshape back to original image shape
      quantized_image = quantized.reshape(h, w, 3)

      # Also return the labels and centers for color separation
      labels_reshaped = labels.reshape(h, w)

      return quantized_image, (labels_reshaped, centers)
Conclusion
Color Separator is a versatile and powerful tool for anyone looking to manipulate and analyze colors in images. With its intuitive interface and robust features, it simplifies the process of color separation and editing, making it accessible to both professionals and hobbyists alike.
For more detailed information and future updates, stay tuned to our GitHub repository.
Links : TODO
Tags :
Date : 17th March, Monday, 2025, (Wikilinks: 17th March, March 25, March, 2025. Monday)
Category : Others